Showing posts with label Home. Show all posts

Wednesday, June 19, 2013

Porch Roof Went Splitsville...
...But Everything's Back Together

Though nowhere near as bad as places like Oklahoma, we have had a fair amount of rain and wind here in Chicago of late.  The other day on my way out the door I noticed that it was raining on the inside of the porch..."This can't be good," I thought.  After the storm I inspected the roof and found that there were indeed a couple of tears in the membrane.

Fortunately, this is a relatively easy repair!  SAFETY FIRST: This roof is flat and accessible by a doorway, and the tears were not near the edge of the roof.  Don't go climbing up a ladder to save a few bucks if you don't know what your doing, and certainly don't do it alone!  A storm earlier in the year caused some interior damage that I fixed, but the roof leak was fixed by a team of professionals with the right equipment to get up on the main roof and make a long lasting repair.

I didn't need much in the way of materials, just some roof repair tape, a bucket of roof sealer, and a cheap brush (you can try to clean asphalt out of a good brush if you want, but I have better things to do with my time!).  You'll also need a broom and a drywall knife or some sort of blade to cut the tape. I already owned a broom and a knife, and the rest of the materials totaled about $25 at a home improvement store.

Materials overshadowed by the worker :)
(c)2013 Eric E. Paige
The first step is to sweep the area clean.  Next, place the tape over the affected area. It's basically like a giant band-aid for your roof. You cut it to length, remove the paper to expose the adhesive and press it into place.

(c)2013 Eric E. Paige

(c)2013 Eric E. Paige

(c)2013 Eric E. Paige

The final step (yes it really is that easy!), is to brush on a coat of roof sealer.  You may have noticed that this roof is heavily checked (the asphalt has shrunk so the surface is all pebbly), so I used a thick coat to help fill in any gaps between the tape and the surface.  

(c)2013 Eric E. Paige

(c)2013 Eric E. Paige
It might not last for ever, but it will buy some time.  It definitely was quick and easy; in fact, it took me longer to put together this blog post!  Stay tuned, I am working on an article about the wall and ceiling repair warranted by the spring storm!

There's more home repair and DIY projects here, click here to learn how I turned my sunroom from 70s paneling into a modern space.

To learn how I turned a discarded stool into a side table, click here.

Tuesday, April 2, 2013

Affordable Lighting...
...With Just A Few Brushstrokes

As you may have gathered from my paintings (click here to check them out), I am a fan of the Arts & Crafts Period. Some of my favorite pieces from this era are lamps. I love the soft glow from a lamp with a mica shade and the play of color from a stained glass shade. Buying period lamps or even high quality reproductions is a bit out of my price range, though. Fortunately, thrift shops are a great source for finding great lamps that just need a little update to their finishes.

This first lamp had that antique brass finish found on so many replica pieces. It was also missing it's glass shades.

Waterlily Lamp
(c) 2012 Eric E. Paige, All Rights Reserved

The first step is to check the lamp over to make sure the cord and socket are in good shape, and that the lamp works. Don't despair if you find a great lamp with a bad cord or socket, these parts can be replaced. If you aren't mechanical, there are lamp and hardware stores that will do the re-wiring.

I decided for this lamp I wanted more of a copper tone rather than brass, and I wanted to add just a hint of color on the lily pad and blossom. I cleaned the surface with rubbing alcohol to remove any dirt and grease that might prevent the paint from adhering. In this case I painted directly on the metal, but if the lamp is going to be handled quite a bit or is subjected to humidity or temperature changes, you might want to prime the surface with a metal primer. Try to pick a primer similar in color to your base coat. For example, I would use a red primer for a copper painted piece.

Metallic paints often take several coats (though a primer will help reduce that number). Once I had the whole thing a nice copper color, I went back and lightly brushed on some metallic colors to bring out the lily pad and blossom. Though the glass shades were missing, I found two mica shades for 50 cents each at a thrift shop. Though they don't look like lilies, they are similar to other lamp shades from the Arts and Crafts Period.

Base after applying copper paint and metallic colors
(c) 2012 Eric E. Paige, All Rights Reserved
Detail of mica shade
(c) 2012 Eric E. Paige, All Rights Reserved
The finished piece
(c) 2012 Eric E. Paige, All Rights Reserved

Sometimes it is not just the base that has a not so great finish. This next lamp had a nice shape, but the glass shade was definitely stuck in the 1980s!

Stained Glass Lamp, circa 1980s
(c) 2012 Eric E. Paige, All Rights Reserved

I used a combination of glass paint, acrylic mediums, and metallic paints, to glaze over the original colors to get the colors that I wanted. I also painted over the black 'leading' with pewter colored paint to make it look more like real lead. As with the other lamp, I base coated the body in copper and used colorful metallic paints to highlight the design.

The finished piece.
I painted over the 80s color scheme with glass and metallic paints
(c) 2012 Eric E. Paige, All Rights Reserved
Lamp base painted in copper and detailed with metallic paints.
I also applied a coat of  asphaltum to bring out the details
(c) 2012 Eric E. Paige, All Rights Reserved

I was pretty aggressive with my color on the stained glass, because I knew I wouldn't have this lamp on very often, so the translucency wasn't the main concern. Still, it's not too bad when lit. I have since done some other shades using solely glass paint, and they definitely do better when lit. I don't leave the bulbs on in these lamps very long and use a lower wattage bulb so as not to melt the paint.

The shade lit
(c) 2012 Eric E. Paige, All Rights Reserved

The next lamp was made from two separate purchases. I found the shade at a thrift store for a few dollars, but it is missing the piece that allows it to attach to a base (it also was missing the base!). I found the base at a yard sale. It had a paper shade that was squarish like my glass shade. I removed the paper part of the shade exposing just the wire framework and then 'squished' the framework flatter to accommodate the shorter glass shade and simply set the shade on the wire frame. Though this works, it isn't the most sturdy solution and you wouldn't want to do it in an area where the lamp might get bumped or handled a lot (I have the outlet on a remote, so the only time I need to touch the lamp is when I dust it or change the bulb).

Prairie style lamp
Prairie Style lamp shade as missing the top piece
(c) 2012 Eric E. Paige, All Rights Reserved
I found the wooden base at a garage sale.
I reshaped the metal frame from a lampshade to hold the glass shade
(c) 2012 Eric E. Paige, All Rights Reserved

Paint can also be useful for matching replacement parts. This ceiling fixture, which I picked up for under $15, was missing the chain and the hardware to mount it to the ceiling, including the cover for the wiring. While I was able to find chain in a color that look alright, all of the covers were in bright brass, antique brass, and chrome. I simply painted the cover a copper tone similar to the color of the fixture.

Prairie Style ceiling light
(c) 2012 Eric E. Paige, All Rights Reserved
A bit of copper paint makes the replacement cap match the light
(c) 2012 Eric E. Paige, All Rights Reserved

Not all lamps are so labor intensive. This next one had a nice finish, but was missing its glass shade. My living room and dining room are in different styles and open to each other, so I like to have some elements in each room provide a nod to the other room's style. I simply put an inexpensive contemporary shade from IKEA on this Craftsman-style base. No paint, no labor, and under $25 for the lamp and shade!

This Goodwill find has great Craftsman Style details
(c) 2012 Eric E. Paige, All Rights Reserved
The stained glass shade was missing.
This simple, white shade fit great,
and fits in with the more modern decor of this room
(c) 2012 Eric E. Paige, All Rights Reserved 

Lighting is key to a great looking room, and with a little paint, some imagination, and perhaps a new lampshade, you can have great looking lamps at affordable prices.

Wednesday, March 20, 2013

SPRING - A Time For New Beginnings, But Don't Forget Your Roots!

Though it's only 24 degrees here in Chicago, today is the first day of Spring -- the perfect time to start something new. Last year I launched a website for my artwork Today I am taking things a step further, by launching this blog (or relaunching it if you a are viewing it on my artwork website). Over the past year I have received a lot of positive feedback on my Facebook posts, particularly my cooking and re-purposing projects, as well as my art and photography. This blog will share my projects along with other helpful information that I come across.

There are many types of artists and artwork -- while some of my work might have a greater meaning, a lot of it is created because I think we should all live in beautiful surroundings. The same goes for my other projects. Having picked a lot of low paying jobs over the years, I have taught myself how to do a lot with a little. You don't need a big budget to make your home beautiful or put a delicious, healthy meal on the table, and this blog will show you how.

So that's the New Beginning, now for the roots -- literally and figuratively. Spring is a time for celebration in most cultures. Having been raised in the Christian tradition, that celebration is Easter. My Mother's family is Polish, and for the Polish, Easter is perhaps the most important holiday of the year, therefore, it also has special foods. My favorite is Easter or świeże kielbasa (świeże means fresh) served with horseradish. My grandmother didn't make fresh horseradish, she bought it in a jar from the local grocery store. I didn't have the real deal until I was living in upstate NY. I learned how to make it from a Slovenian farmer. Every year his son-in-law and his friends would come over to help dig the roots and clean and peel them. Depending on how potent the roots are, this could be an experience that literally brought tears to your eyes. After cleaning and peeling the roots were cut into smaller pieces and processed in a blender to the desired consistency. The end product was not the yellowish gray mush you buy in the store, but a snow white condiment bursting with not just heat, but flavor. It was love at first bite!

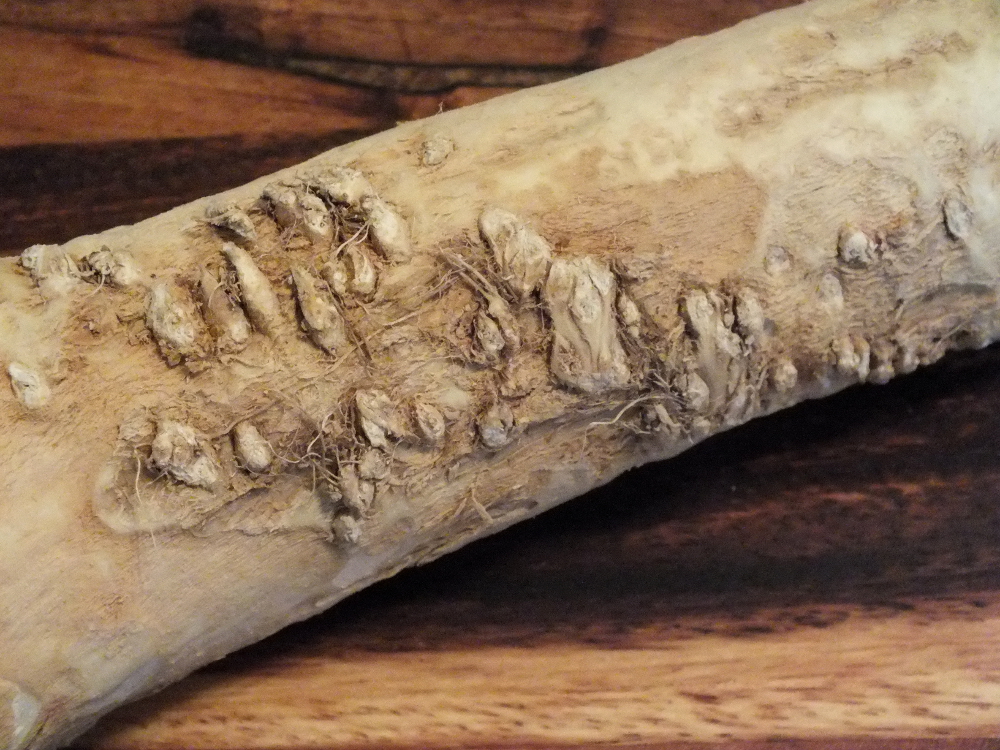
My first attempt to make horseradish on my own was less successful. The root I bought was on the weak side and was a little too tough and stringy. I decided that probably a store bought root was just not going to cut it and since I no longer lived in Upstate NY and had no place to grow horseradish that I would have to just enjoy the memory of days gone by. For the past few years I have spent Easter here in Chicago with my brother-in-law's cousins. Also of Polish descent (my brother-in-law's Grandfather had a Polish grocery store in Chicago's Bridgeport neighborhood), they enjoy many of the same Polish foods that I had growing up. Last year, while poking around one the Polish markets, I saw horseradish root and decided to give it one more try (worst case scenario, it would suck and I would bring something else to the dinner). The roots looked much fresher than the one I had bought at a grocery chain years ago and when I picked one up, there was actually a faint smell of horseradish. It turned out quite well and got rave reviews on Easter Sunday, so I am making it again this year. I picked up a root today (pictured here) and will post pictures of the finished product.

Horseradish Root
(c) 2013 Eric E. Paige, All Rights Reserved

We are a nation of immigrants and while it is important to move forward, it is also important to remember where we came from. In a culture that values homogeneity as much as ours, traditions can fade quickly. All four of my Mother's grandparents were from Poland, her parents could speak Polish, my Mom can understand most of a conversation in Polish but cannot speak it fluently, and my sister and I only know a few words and phrase. Food is a great way to honor our heritage - a direct sensory connection to the past. I hope, whatever your heritage, you take the time this Spring to enjoy the foods and traditions of your ancestors.